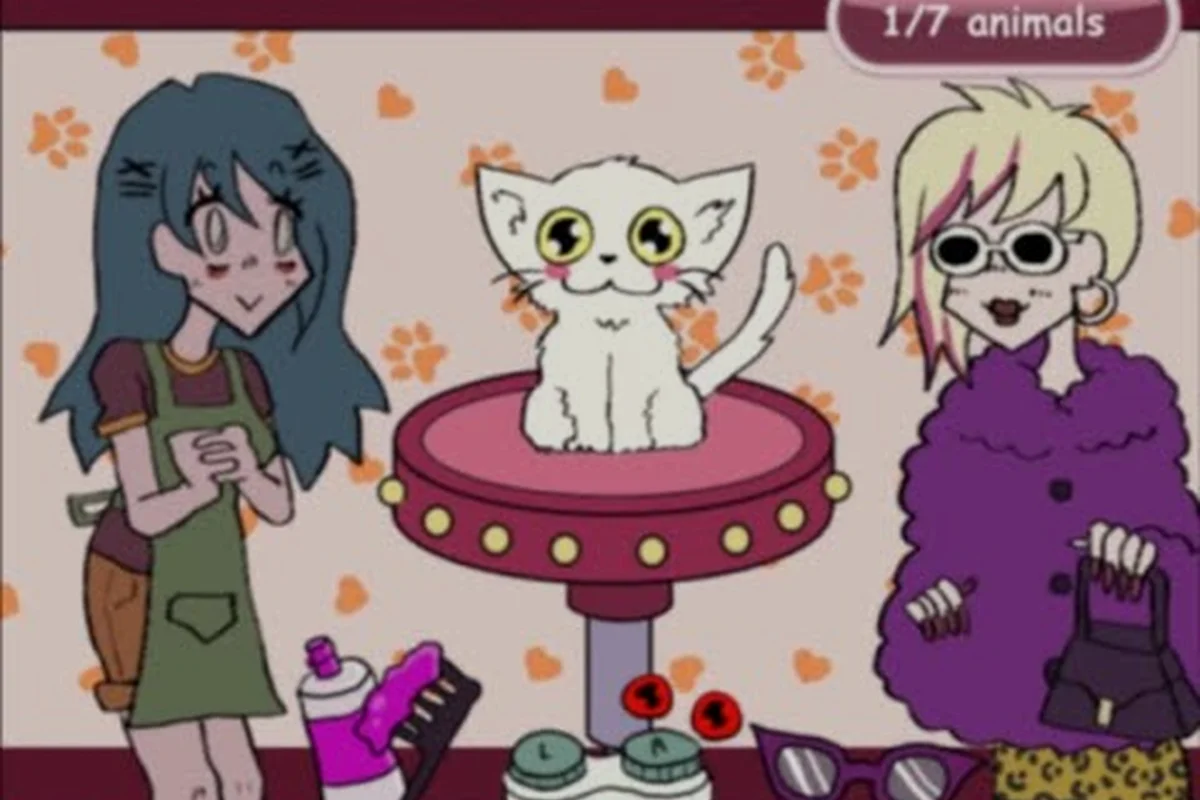
Lacey's petshop is the third installment in the series, and it's also the entry most players get stuck on, because the shop counter hides a wardrobe puzzle that quietly decides which ending you see. This walkthrough covers the pet choices, the mirror scene, and every ending branch so you can finish in one clean run.
What Makes the Petshop the Hardest Entry in the Series
The petshop mini-game drops you behind the counter of "one of the most famous pet shops in town," and from the first customer the game asks you to juggle three systems at once: pet selection, customer satisfaction, and a wardrobe state that most players never notice until it's too late. According to the Laceysgames Wiki page for Lacey's Petshop, the developer ghosttundra named this the most difficult entry to build, and that difficulty is baked into the design rather than the controls.
What trips people up is pacing. The petshop doesn't punish slow clicking; it punishes wrong sequencing. If you hand over a pet before checking the wardrobe state, you lock a branch without any warning. That's why a proper Lacey's Flash Games petshop walkthrough starts with reading the room, not with serving the first customer.
Here's the high-level flow you're working through: you arrive at the counter, match each customer to the pet type they request, hit the mirror scene where your wardrobe state gets locked in, and then watch your accumulated flags resolve into one of the game's endings. The trap is that the phases aren't independent — the pet-matching score you build in phase two feeds directly into which ending branch phase four can reach, and the wardrobe state variable recorded at the mirror silently gates options you won't see until the final screen. That's why a Lacey's Flash Games petshop walkthrough has to treat the sequence as one continuous decision tree rather than four checkpoints, and why the all endings route demands replaying from the mirror scene rather than from the counter.
-
Arrival phase — Lacey takes over the counter and the first customer walks in
-
Pet matching phase — each customer wants a specific animal type
-
Wardrobe phase — the mirror scene triggers and outfit state is recorded
-
Ending phase — your accumulated choices resolve into one of several outcomes
The key insight: the petshop and the wardrobe aren't separate minigames in the way people assume. They're two halves of the same decision tree, and the full list of Lacey's Flash Games minigames shows how this one sits between the lighter entries and the ending-heavy ones.
| Phase | What You Control | What Gets Recorded | Common Mistake |
|---|---|---|---|
| Arrival | Nothing (cutscene) | Starting flag | Skipping dialogue that hints at the mirror |
| Pet matching | Which pet you hand over | Customer satisfaction score | Serving too fast and ignoring the request text |
| Wardrobe | Outfit selection at the mirror | Wardrobe state variable | Changing outfit after the mirror scene |
| Ending | Nothing (auto-resolve) | Final branch | Assuming one run shows everything |
Lacey's Petshop Walkthrough: Step-by-Step Through the Counter
This section is the core of the Lacey's Flash Games petshop walkthrough, so treat the counter sequence as a fixed order rather than a menu of free choices. Each customer request maps to a specific pet and care action, and skipping or reordering one step silently pushes you toward the default branch instead of the ending you're aiming for. Work through it in order and you'll hit the ending you're aiming for instead of a default branch.
Step 1 — Read the First Customer's Request Carefully
The opening customer sets the tone for the whole run. The request text is short, but it names an animal type and an implied mood. Match both, not just the animal. A nervous customer who asks for a calm pet will still be unhappy if you hand over an energetic one, and that dissatisfaction carries into the ending calculation.
Take the extra two seconds to reread. Players who rush the first handoff report more "unexpected" endings than any other group, and the reason is almost always a mismatched mood rather than a wrong species. The request text gives you two separate signals: the animal name and the emotional descriptor (calm, playful, shy, bold). Cross-check both against your kennel before clicking, because a wrong-species delivery at least flags itself on the results screen, while a mood mismatch slips through silently and only surfaces when the ending screen tallies your hidden satisfaction score.
Step 2 — Track Your Pet Handoffs
Each handoff is a data point. Keep a mental tally of which pet types you've given out, because the game quietly weights repeated choices. Handing out the same animal three times in a row nudges you toward one branch; spreading your choices nudges you toward another.
| Handoff Pattern | Likely Branch Influence | Notes |
|---|---|---|
| All same species | Skewed toward one ending | Easiest to trigger accidentally |
| Alternating species | Balanced, neutral path | Safest for a first run |
| Mood-matched, species-varied | Strongest satisfaction score | Best for the "good" outcome |
| Random / rushed | Default fallback ending | What most first-timers get |
Step 3 — Don't Touch the Wardrobe Early
The mirror scene is triggered by progression, not by you walking to it. If you interact with the wardrobe before the game prompts you, the outfit state can be recorded at the wrong moment and the branch desyncs. Wait for the prompt, then commit to one outfit and leave it alone.
This is the single most common failure point in the Lacey's Flash Games pet shop game, and it's why so many players finish a run convinced they made a choice they never actually made. The wardrobe doesn't just track which outfit you're wearing — it timestamps the moment the outfit state flips, and the mirror scene reads that timestamp to decide which branch of the Lacey's wardrobe endings you're routed into. Touch the wardrobe early and the outfit state gets written before the progression flag is set, so the game logs a change you never intended; the ending you get then reflects that phantom input rather than your actual decision. It's a desync, not a punishment, which is exactly why it feels so unfair — nothing warns you, and the run plays out normally right up until the ending screen contradicts what you remember choosing.
The Wardrobe Puzzle and the Mirror Scene Explained
Lacey's wardrobe is where the petshop's real branching lives, and it deserves its own breakdown because the two systems share a save state. The wiki's production note about the mirror scene is telling: ghosttundra had to craft a physical mask to build that sequence, which is why the mirror reads as more deliberate and "authored" than the rest of the shop.
In practice, the wardrobe works like a small state machine: each outfit you select at the mirror writes a distinct value to the wardrobe state variable, and that value persists in the shared save file rather than resetting when you leave the room. Because the mirror scene was hand-authored (ghosttundra's physical mask), the state check is reliable — outfit swaps register immediately, and the "no change" path simply carries forward whatever value you walked in with instead of forcing a default. This is why the wardrobe walkthrough matters for all endings: a single missed outfit swap can lock you out of the rarest branch even if your petshop satisfaction score is maxed.
-
Outfit A sets the wardrobe state to its first value
-
Outfit B sets a second value
-
Outfit C (and any unlockable variants) set further values
-
Leaving the mirror without changing preserves whatever state you arrived with
The wardrobe state then combines with your petshop satisfaction score at the ending screen. Because the two values are stored independently in the same save file, the ending check reads them as a pair rather than a single score, so two players can hand over identical pets and still land on different endings purely because of what they wore at the mirror. Concretely, a maxed satisfaction score paired with the default outfit resolves to the neutral/standard ending, while the same score with the unlockable outfit unlocks the rarest branch — meaning the wardrobe walkthrough, not the petshop grind, is what gates the best ending.
| Wardrobe State | Combined With High Satisfaction | Combined With Low Satisfaction |
|---|---|---|
| Default outfit | Neutral / standard ending | Fallback ending |
| Alternate outfit | One specific branch | A different, shorter branch |
| Unlockable outfit | Rarest branch | Mixed branch with truncated scene |
| No change at mirror | Inherits arrival state | Inherits arrival state |
For the full picture of how outfit and choice variables interact across every minigame, the wardrobe and petshop ending breakdown covers the replay logic in more depth — specifically how the ending check reads the wardrobe state value and the petshop satisfaction score as a pair rather than a single score. That pairing is why two players who hand over identical pets can still land on different endings purely from what they wore at the mirror: a maxed satisfaction score with the default outfit resolves to the neutral/standard ending, while the same score with the unlockable outfit unlocks the rarest branch. In other words, the wardrobe walkthrough, not the petshop grind, is what gates the best ending, and the breakdown traces each branch back to the exact outfit swap that triggers it.
Why the Mirror Scene Feels Different
The mirror sequence has a distinct visual treatment — a masked reflection, tighter framing, and a beat of silence before the prompt appears. That's not stylistic filler. It's the game telling you that a decision is being recorded. Treat the pause as a save point and make your outfit choice deliberately rather than clicking through it.
All Petshop and Wardrobe Endings and How to Reach Them
Getting all the endings is the real goal for most players, and the good news is that the branches are deterministic — no randomness, no timing windows. The Lacey's Flash Games petshop all endings set comes down to two variables: satisfaction score and wardrobe state.
| Ending | Satisfaction | Wardrobe State | How to Reach It |
|---|---|---|---|
| Standard close | High | Default outfit | Mood-match every customer, never change outfit |
| Wardrobe branch | High | Alternate outfit | Mood-match, then switch at the mirror prompt |
| Rare branch | High | Unlockable outfit | Mood-match, unlock the outfit first, then mirror |
| Truncated branch | Low | Any alternate | Rush handoffs, then change outfit |
| Fallback | Low | Default | Rush everything and skip the mirror |
Fastest Route to the Rare Ending
The rare branch needs three things in sequence: an unlockable outfit available before the mirror prompt, a high satisfaction score, and a committed mirror choice. If you're missing the outfit unlock, the game silently falls back to the wardrobe branch, which is why players often think the rare ending is bugged. It isn't — it's just gated.
For the wardrobe-specific outcomes, the Lacey's Flash Games wardrobe walkthrough sibling guide covers how outfit unlocks carry between runs. The practical takeaway for the rare ending is that the outfit must be equipped at the mirror prompt, not merely unlocked — the petshop's wardrobe branch checks the active outfit slot, so an unlocked-but-unworn dress still triggers the fallback. Confirm the outfit is selected in the wardrobe screen before approaching the mirror, and note that satisfaction score carries over from the pet-care phase, meaning grooming and feeding choices made earlier in the same run directly affect whether the rare branch stays open.
Replay Efficiency
Each full run is short — roughly five to eight minutes once you know the flow. That means collecting every ending is a matter of maybe four focused runs rather than a long grind. Plan your runs around one variable at a time: first run for the standard close, second for the wardrobe branch, third for the rare branch, fourth for the low-satisfaction fallbacks. Changing two variables at once makes it much harder to tell which one flipped the ending.
Practical Tips for a Clean Petshop Run
Beyond the branch logic, a few habits make the petshop noticeably easier, and most of them come from repeated runs and community reports rather than any hidden mechanic. The biggest is treating the first two customers as a scoring checkpoint: because early satisfaction carries disproportionate weight, a sloppy first handoff can lock you out of the high-satisfaction wardrobe endings long before the mirror scene. Pair that with tracking your outfit choice on paper when chasing a specific ending, since the game saves at the mirror prompt rather than after it — reloading mid-mirror just replays the same branch. Watching each customer's expression after a handoff gives you a live satisfaction readout, and finishing a run even on the wrong branch matters because partial runs never record an ending in your gallery.
-
Slow down on the first two customers. They carry disproportionate weight in the satisfaction calculation.
-
Write down your outfit choice if you're chasing a specific ending across multiple runs.
-
Don't reload mid-mirror. The state saves at the prompt, not after it.
-
Watch the customer's expression after each handoff — it's a live readout of your satisfaction score.
-
Finish the run even if you know it's the wrong branch; partial runs don't record endings.
If you're still working out how the game's progression and save behavior works overall, the new player tips and save system guide explains where the game stores your state between sessions.
Common Mistakes Worth Avoiding
The most expensive mistake is treating the petshop like a clicking game. It rewards reading, not speed. The second most expensive is assuming the wardrobe is cosmetic — it's a variable, and it's the variable that decides your ending. The third is replaying without changing anything, which just reproduces the same branch.
Frequently Asked Questions
How many endings does Lacey's petshop have?
There are five distinct outcomes based on community documentation: the standard close, the wardrobe branch, the rare unlockable-outfit branch, the truncated branch, and the low-satisfaction fallback. Each is determined by your satisfaction score combined with the wardrobe state recorded at the mirror scene.
Do I need to play Lacey's wardrobe separately to get the petshop endings?
No. The wardrobe puzzle is embedded in the petshop run itself — the mirror scene triggers automatically as you progress. You only need to make a deliberate outfit choice at the prompt rather than clicking through it, since that choice is what sets the ending branch.
Why did I get the same ending twice in a row?
You almost certainly repeated the same satisfaction pattern and the same wardrobe state. The system is deterministic, so identical inputs produce identical outputs. Change one variable per run — either your handoff pattern or your mirror outfit — and the ending will shift.
Can I change my outfit after the mirror scene?
You can, but it won't affect the current run's ending. The wardrobe state is locked at the moment the mirror prompt resolves, so any later outfit change only carries into a future playthrough. Commit to your choice before the prompt closes.
Is the petshop the hardest minigame in the series?
The developer has described it as the most difficult entry to build, largely because of the mirror scene's production demands, and players generally agree it's the most demanding to complete. The difficulty comes from sequencing and hidden state rather than reflexes, so a planned run is far easier than a casual one.
The petshop rewards patience over speed: because the ending is locked the instant the mirror prompt resolves, a run that rushes the handoff sequence can reach the mirror with a satisfaction score too low to open the wardrobe branch, forcing the low-satisfaction fallback. Treat satisfaction score and wardrobe state as the only two levers that matter, and every ending becomes reachable in a handful of short, deliberate runs — change one variable per attempt, as the FAQ above notes, and the deterministic system will hand you a different outcome each time.